

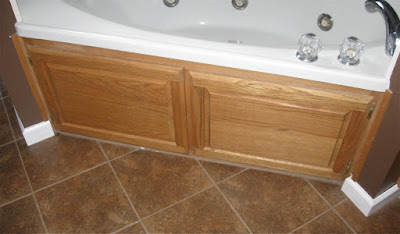
Here's the before:

So, here is the process:
1. Abbey and I took all of the cabinet door knobs and hinges off.
2. Abbey sanded the cabinet doors and cabinet frames lightly.
3. I primed the cabinets and frames.
4. Abbey painted the old hardware.
5. I put the first coat on the cabinets with a roller.
6. We realized the roller wasn't working, so we put another coat on the cabinet door fronts with a brush.
7. We put a third coat on the door.
8. The doors sat and dried while we were out of town for the week.
9. Came home and painted the backs of the cabinets.
10. Uncle Bill and I were fixing some marks in the front of the cabinets when we discovered that we really liked the "aged edges" from sanding. (We were originally going to glaze the cabinets.) I asked Bill to do one door completely for Abbey's approval. She also liked it.
11. Bill and I sanded by hand every edge of the cabinet doors and then I applied a clear Satin polyurethane.
12. I put the hardware back on the cabinets.
13. Abbey and I put cabinet doors back on the cabinets.
14. We feel successful and happy about our makeover.
I know you're dying to see them, but first I'm going to tell you what we learned. We're planning on doing the kitchen cabinets and the upstairs cabinets.
1. Use great paint. We chose Sherwin Williams Oil Based Paint and also Sherwin Williams Oil Based Primer.
2. Don't use a roller at all.
3. Paint the cabinet backs first, let them dry, then paint the fronts.
4. Paint in the Spring or Fall. Winter is too cold for oil-based paints.
5. Be Patient. Be Patient. Be Patient.
6. Try an electric sander next time.
Okay, here's what they look like now:

We used a hammered-look oil-rubbed bronze spray paint on the hardware. Even on the the hinges.

The paint made the cabinet doors a little close, so I'm going to have to plane them a little to get them to close easier. They close fine now, but you have to close them at the exact same time.

We love how it really brightened up our bathroom.

A close-up of the cabinet doors.

And drawers.

A close-up of the hardware and aged look.
We're really pleased with the look and glad that we didn't do the glazing.
2 comments:
They look awesome!! Well worth all the hard work. If you ever want to do another bathroom, I've got one screaming for some updating!
Dave Ramsey has taught you well! Way to go.
Post a Comment